How To Build a Fence
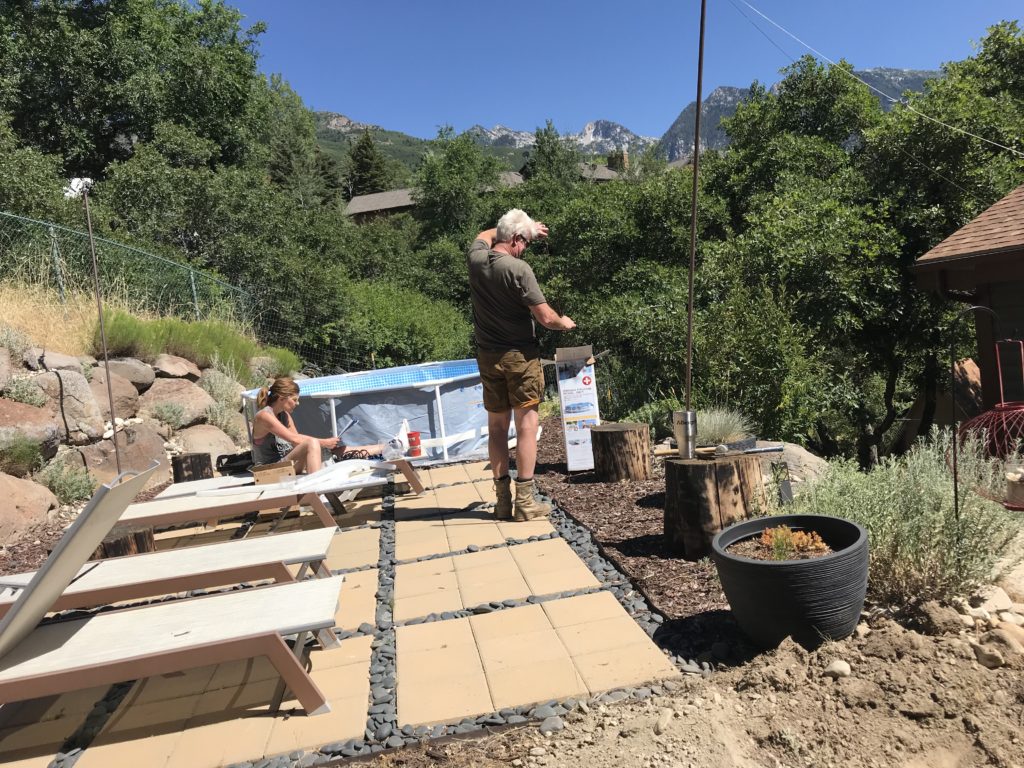
A couple of years ago I built a patio out of brick pavers in my backyard. Since that time, my wife has enjoyed setting up a 10′ in diameter by 3′ deep swimming pool in that space. Our backyard also acts as a dog run, the problem is the dog loves to go swimming in the pool and has punctured the lining and ruined the pool in the past, not to mention just plain dogged out the pool / patio area in general. So, this year I was informed that to eliminate any dog intrusion, I would be building a fence to keep Ranger out of the pool and off the patio area all together.
The Tools You Will Need
- Shovel (spade) and/or Post hole digger
- Square mouth shovel
- Mixing Tub
- Hammer
- Circular or Miter Saw
- Drill and various Drill Bits
- Cordless Drill / Screw Gun
- String
- Level
- Wire cutters and pliers
Fence Posts
The patio is bordered on 3 sides by boulders that create a natural boundary, so the fence must only stretch across one length to protect the pool and prevent Ranger, other animals and most importantly small children from accessing the pool. To begin, I have selected and area that I feel creates the best advantage or ease of construction, as the fence must climb a section of boulders that is extremely uneven, diverse and otherwise difficult to construct a barrier to the dog.
To begin, I have selected the location of my first post hole, (while constructing the patio as shown in the photo above, I have determined the location of any underground power, water, telephone, gas and irrigation lines) to prevent any unwanted disasters, not that any disasters are wanted. I will be using 8′ tall pressure treated 4″ x 4″ pine posts as my fencing anchors. Digging a hole that is approximately 18′- 24″ deep, I will place my first post. The selection of this first post is critical, as all other posts will be measured and centered off this initial post, to ensure a straight line and ultimately a well thought out and hopefully an aesthetically pleasing fence, I have line it up with an existing chain-link fence post as a gauge.
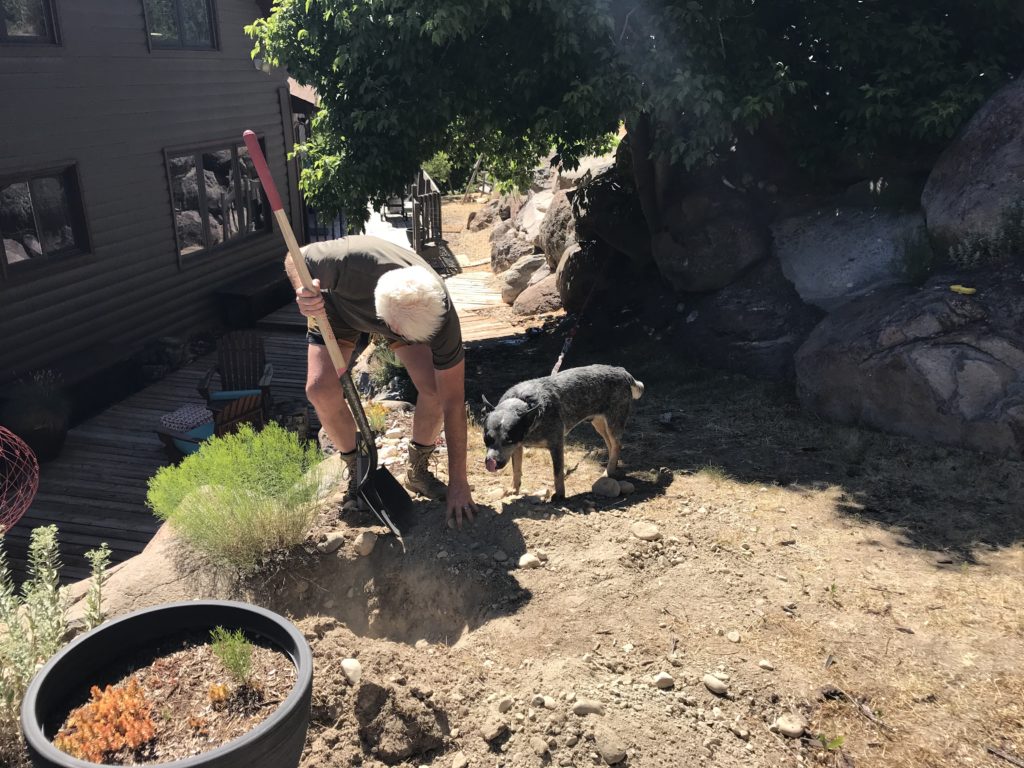
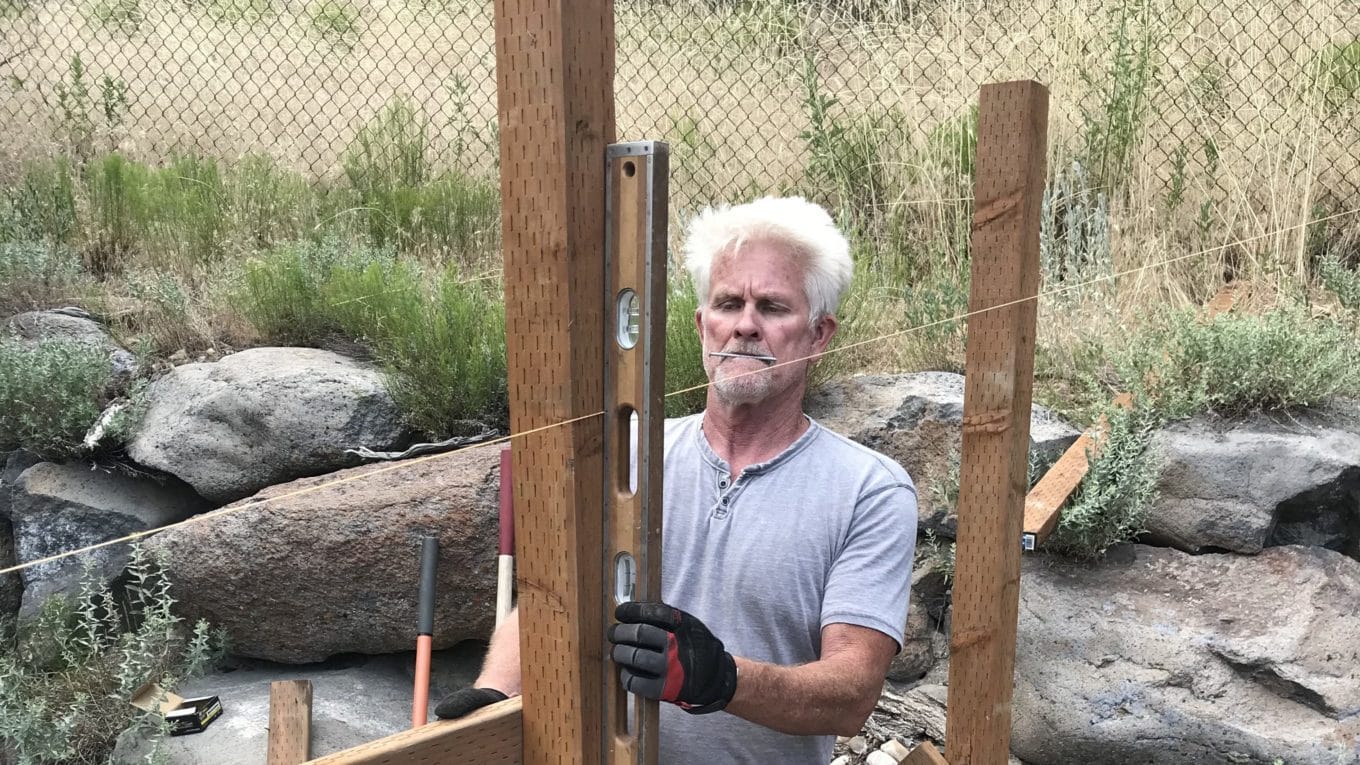
In this case, I dug the hole as close to the boulder field as possible ( see all the surrounding Boulders) as it is my intention to extend the fencing out over the boulders to prevent Ranger or children from climbing around the fencing. As shown in the photo below, I am using a level and 2″x 4″ supports to position the post to ensure it is square and level.
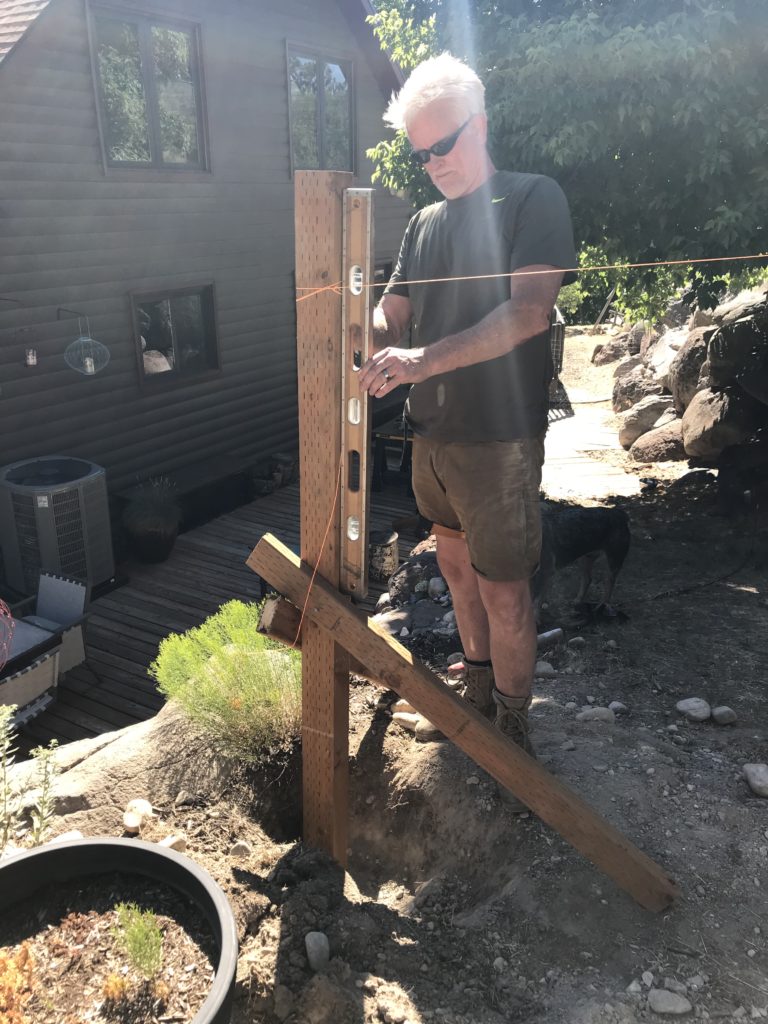
After the initial post is set in the hole, leveled and squared, I will run a string from the the initial post to the section of chain-link fence that I will be tying into and as mentioned earlier. Pulling the string tight and securing by tying off each end, I can now determine the location of all the other fence posts by lining them up with the string.
Leveling and Squaring Our Fence Posts
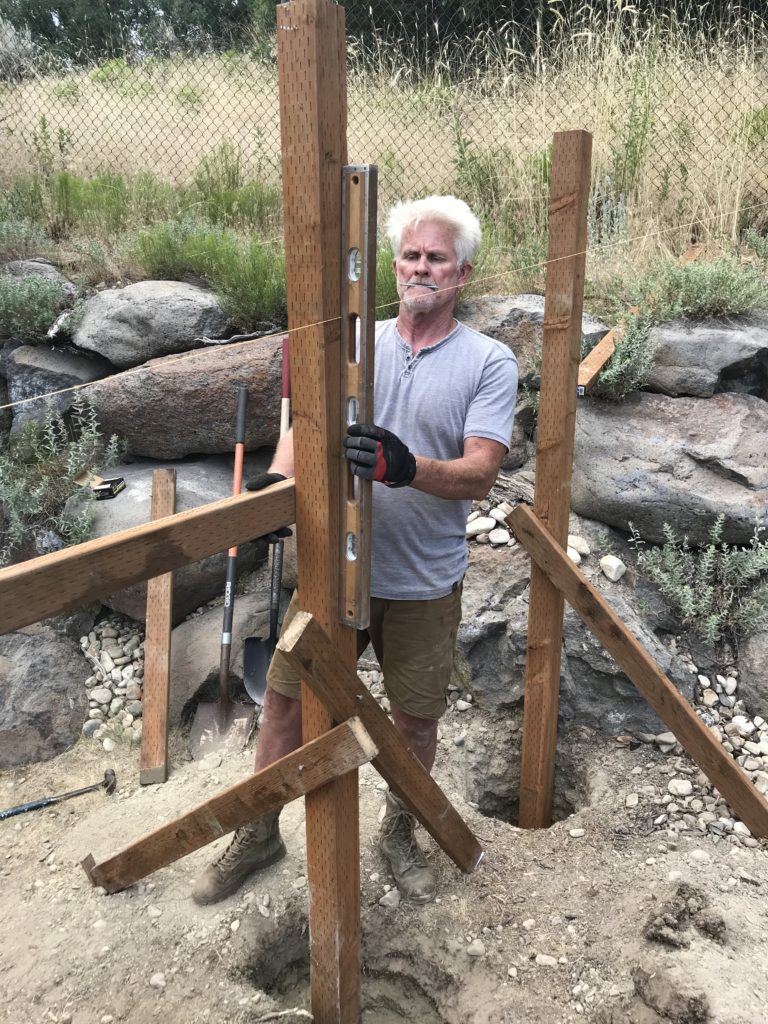
As you are setting and leveling your additional fence posts it is important to make sure that your post is not pushing on the string, rather just barely touching, or even just a hair off the string to ensure the string is not pushed off its straight line. With this fence, I have determined that I would like to have a post set at every 4′, this will result in an extremely sturdy fence, in addition, it will look symmetrical, it will work nicely with the standard 8′ long horizontal pieces of lumber I have chosen to connect the posts, and it lays out almost perfectly with the expanse I’m trying to cover. Note: your fence will need adjustment between posts depending on your particular expanse.
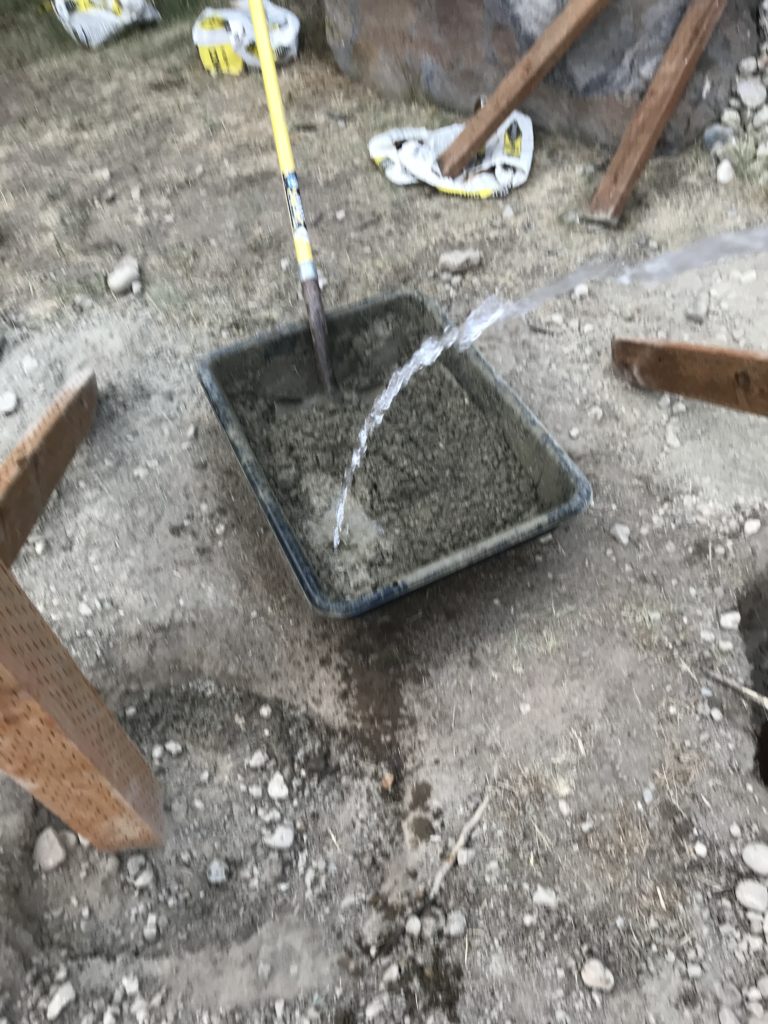
Pouring the Fence Post Concrete
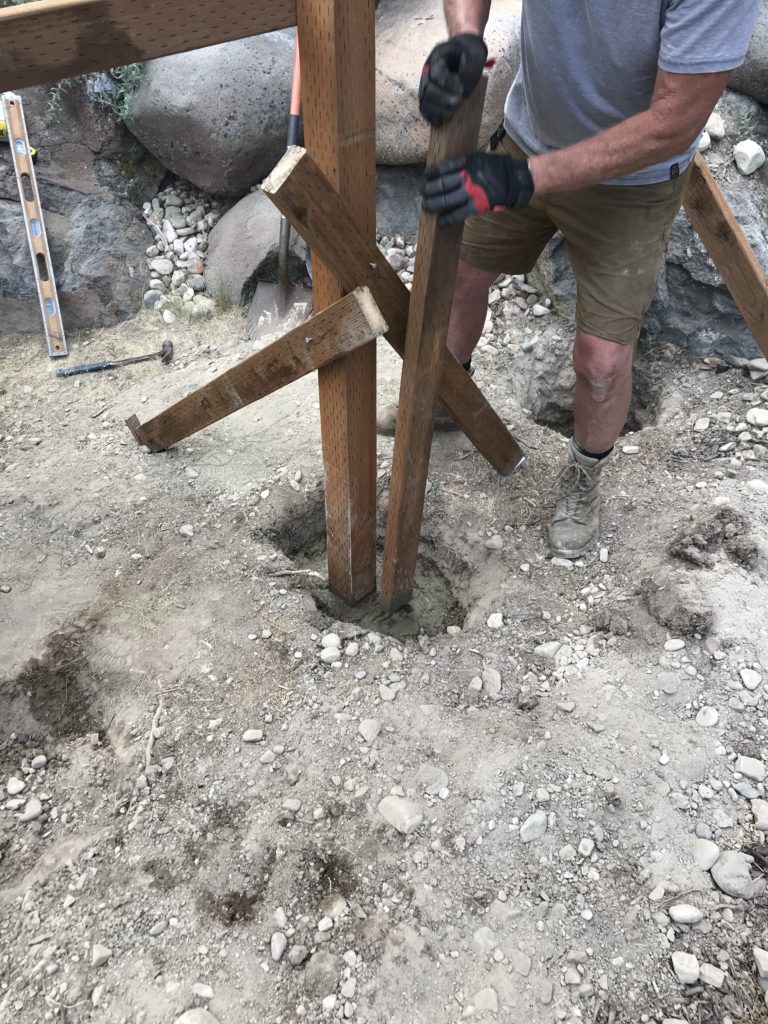
Now that I have dug all the holes, set the 4 x 4 posts within the holes, lined the posts up to the string and level them, it is time to set the posts in concrete. Utilizing any one of a number of brands (Post Mix or Concrete), I pour the mix into a large plastic tub, add water as directed (directions on the product bag) I begin to stir or mix the water into the concrete using a square mouth shovel. In this case, I used 1- 60 lbs bag of concrete mix per post, which will prove to provide ample strength for our fence posts. We do not want the post mix to be runny at all, rather, we want the concrete to be a thick lumpy sludge (thick enough that when you dump a shovel full of it, it slumps and does not level itself like water) NOTE: following the directions on the post mix bag, it is always a good idea to slowly work up to the recommended water content, add the water in increments to ensure that you do not create a mixture that is to runny. Once the mixture is thoroughly mixed (no dry power remaining) shovel the post mix into the post hole, being careful not to upset or knock your post out of level.
Once the Post Mix is poured into the Post hole, adjust the post to ensure that they have remained level and in line with the string we have set. Following this, take hold of a short 2 x 4 or other heavy blunt object and pound the concrete so it settles nicely into every open pocket ensuring a strong, consistent concrete pour. Adjust the bracing and make any final adjustments to your posts as necessary.
Let the concrete dry for a minimum of 24 hours, up to 48 hours under cool conditions. You will be able to ascertain when the concrete has set up sufficiently to begin nailing or screwing into the post with our horizon slats. If in question, wait and extra day or two, as you do not want to loosen the wood posts within the concrete.
Fence Slats: The Layout
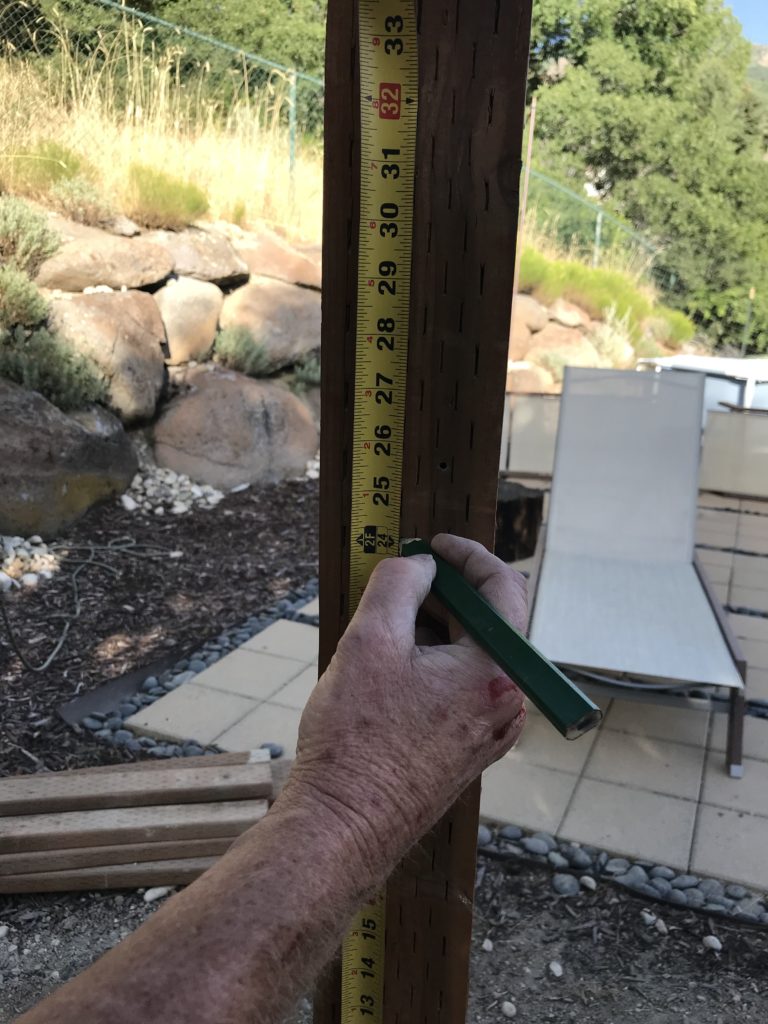
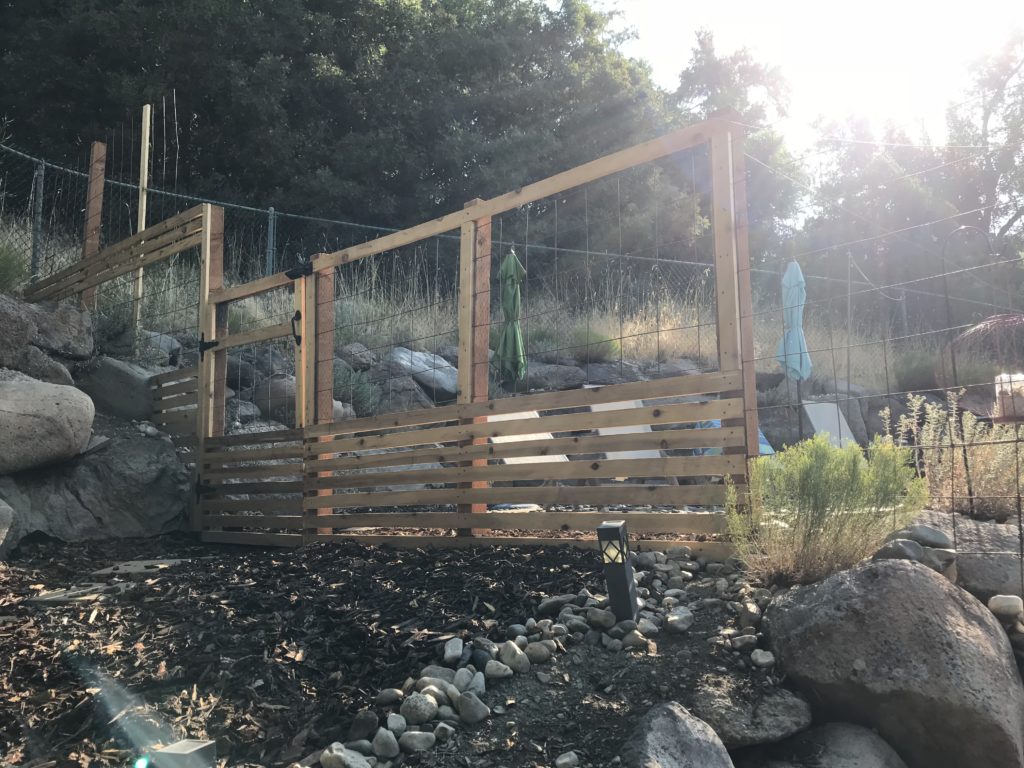
Now that the posts are firmly set in place, it is time to lay out the fence for our wood slats and wire fencing. This fence will be 4′ high total. From the ground up to the 2′ point, the fence will consist of 1″ x 2″ cedar slats horizontally placed so there is a gap precisely 1″ apart from slat to slat. From the 2′ mark above the ground(or the top of the horizontal cedar slats), up to the finished height of the fence ( 4′) I have decided to use a rustic 4′ x 5′ square metal wire fencing material that is very uneven and wavy in nature. Each of the cedar slats is 8′ long, which lines up nicely with the previously laid-out posts ( each 4′ apart). Working from the bottom of the post upward, using 2″ grabber screws, I am able to adjust the posts just ever so slightly to match or line-up the 8″ cedar slats for a very uniform and consistent look aesthetically.
Cedar Slats & Wire Fence Construction
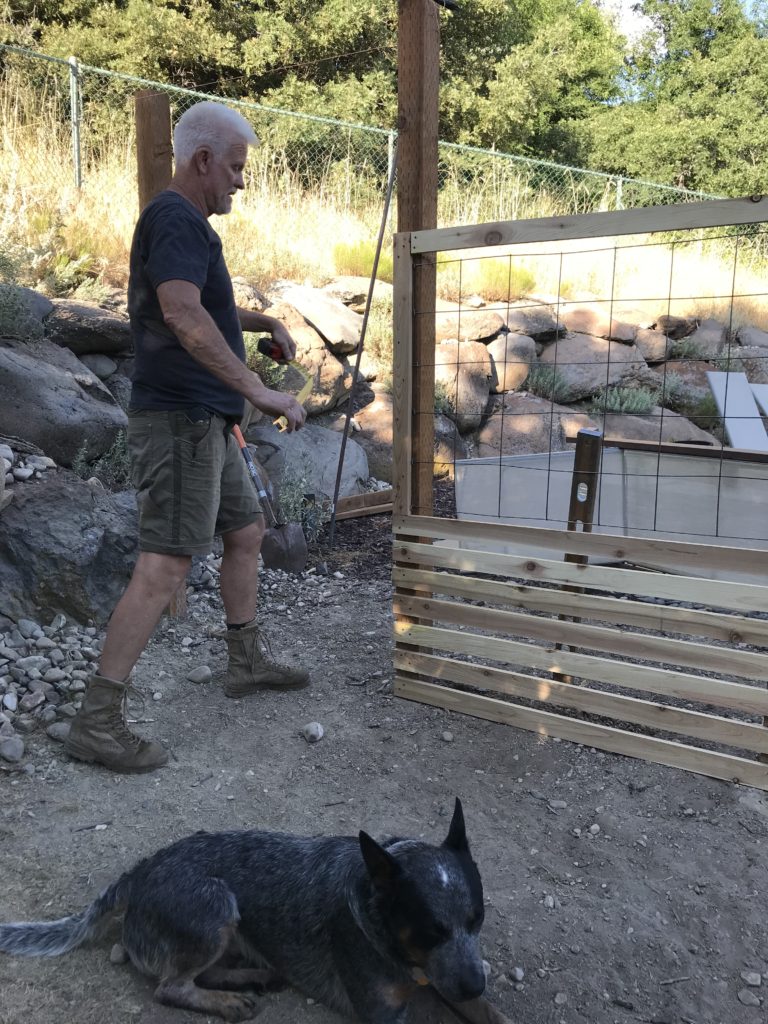
As shown in the photo above, I have completed the installation of the wood slats, leaving a 1′ gap between the board to create a stylish appearance. To ensure that the cedar does not split, I pre-drilled the holes prior to screwing in the boards. Once the installation of the cedar slats is complete, I can now begin to install the wire mess fencing material. As seen, I left a 1″ gap between the last cedar slat and the beginning of the wire mesh fencing material, this adds to the uniform look of the completed fence. I fastened the wire fencing to the posts using 1″ “U” shaped fasteners
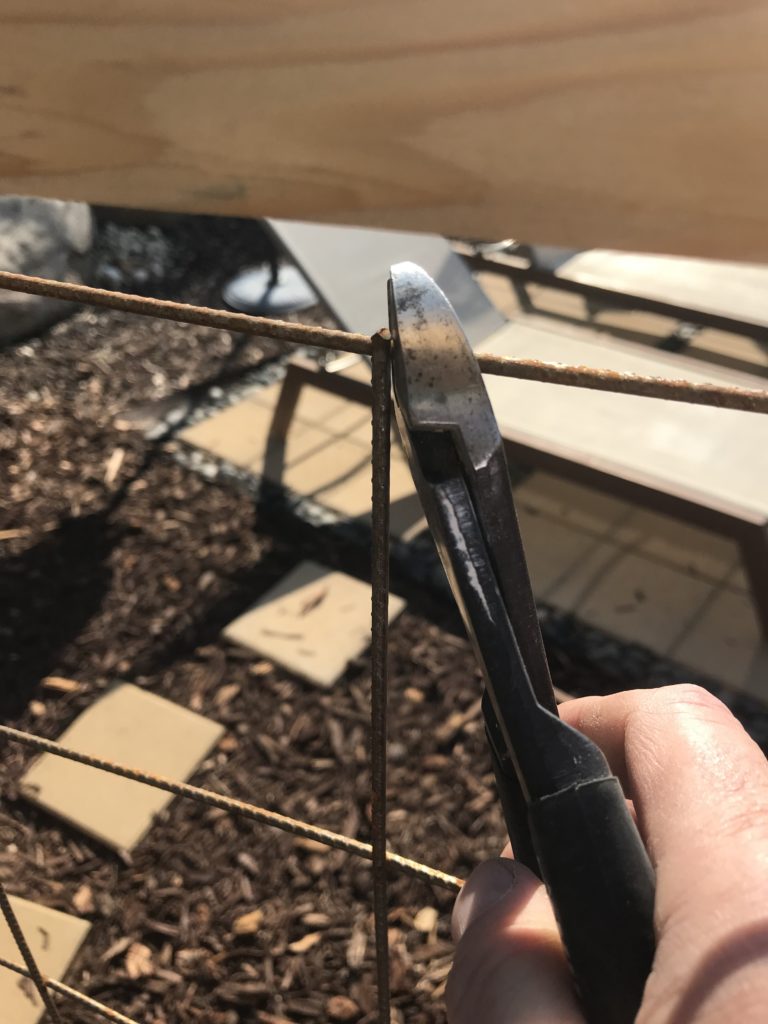
This particular wire fencing came in 4′ x 5′ sheets. Utilizing wire cutters I am able to shape the fence as desired to not only fit the fence between the posts, but to also shape it around the boulders that are present in this particular situation. (See the finished fence at the end of this article.) As displayed above, following the wire installation, I have installed cedar trim over the edges of the wiring.
Fence Gate
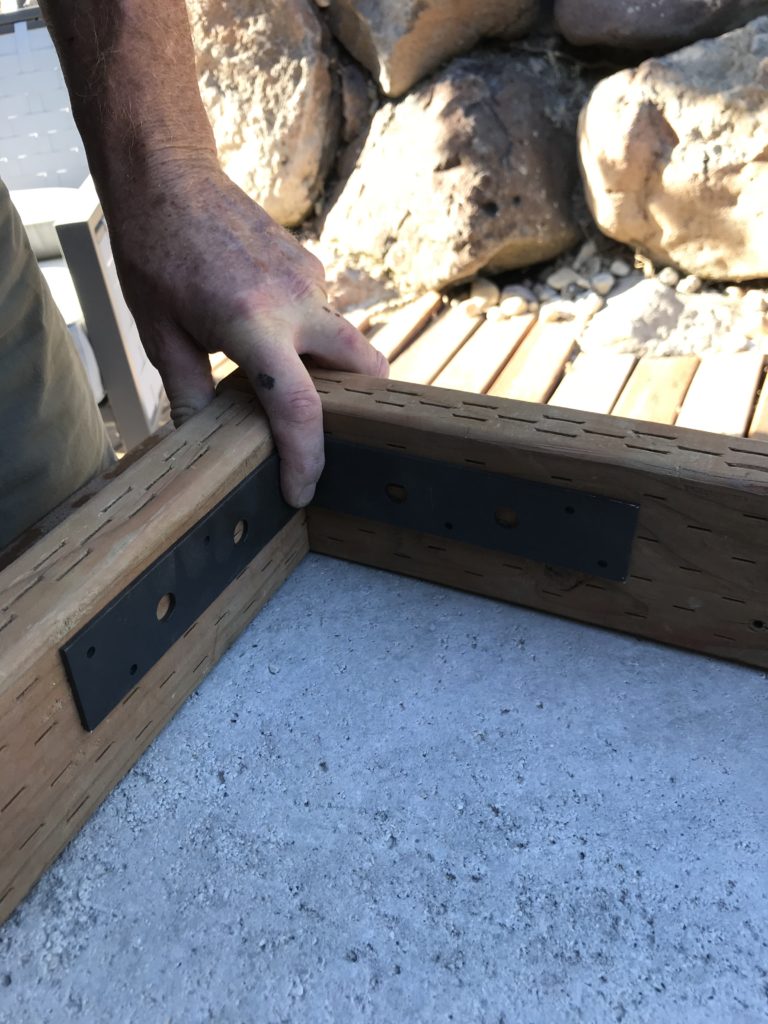
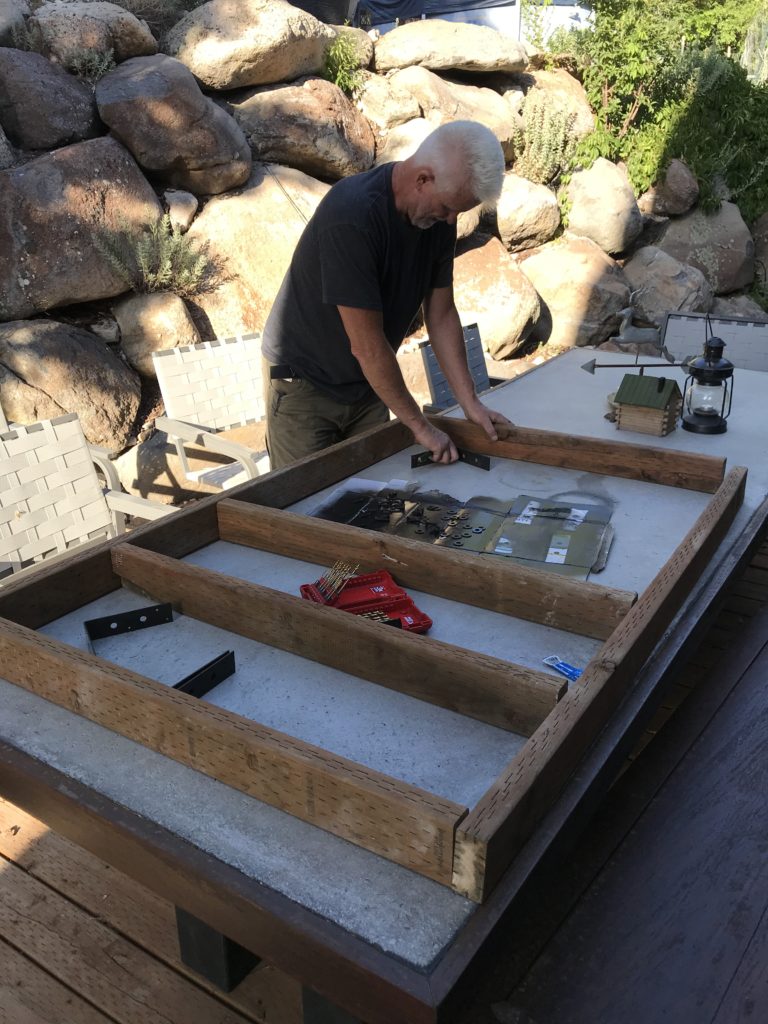
The gate opening is 4′ wide, the same as the distance between our posts. The idea here is to construct a gate that looks just like the sections of fencing that we have already constructed. I begin by measuring the exact dimensions of the gate opening, I then will subtract 1″ from the right and the left side of the gate that I will construct. Subtracting the 1″ from each side will allow for the gate to swing open easily and will also match the 1″ spacing or gaps that we have created on the pother parts of the fence. In the photo above, I am holding the angle iron in position and marking them with a pencil.
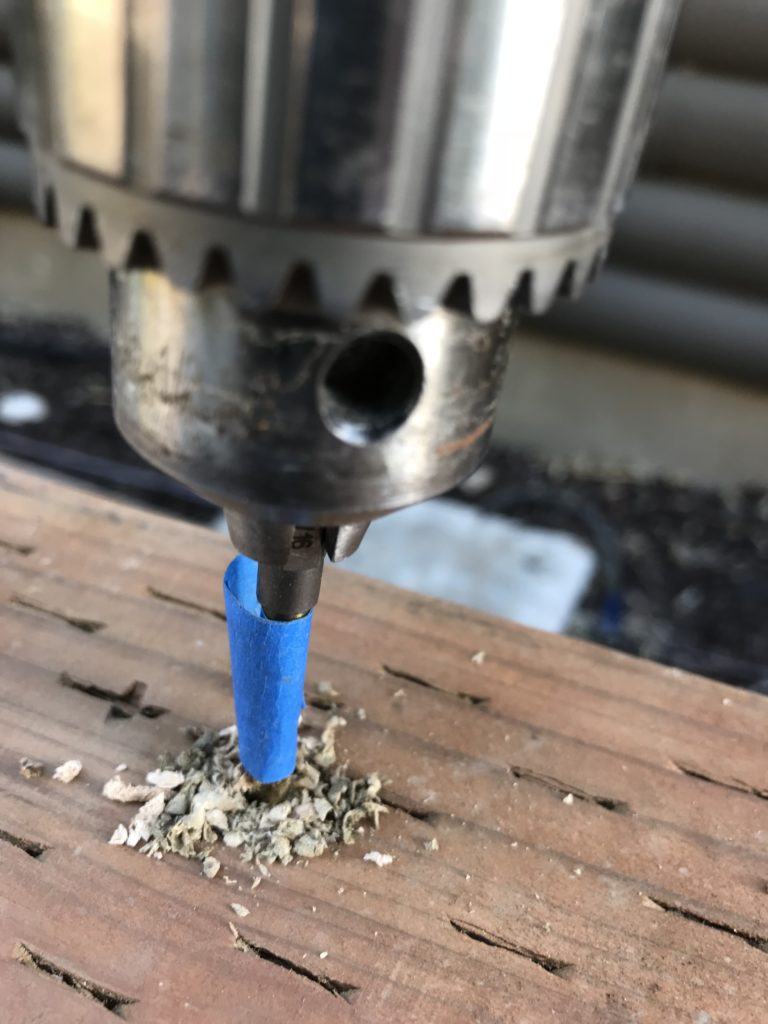
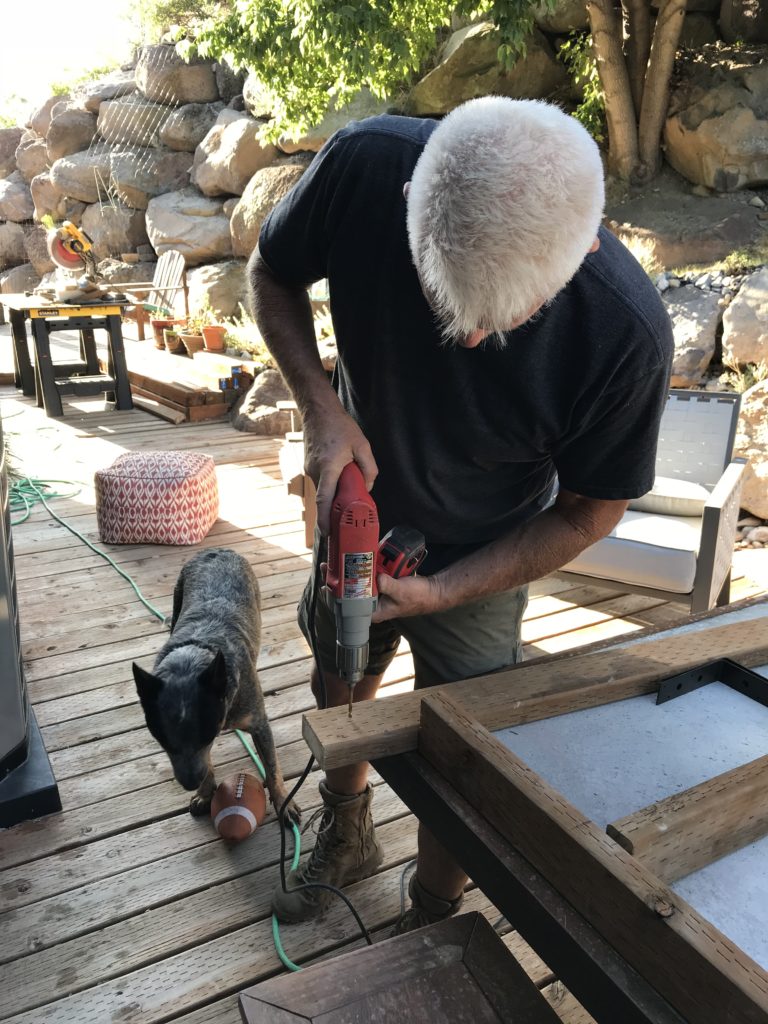
In most instances when building with wood, I prefer to pre-drill the screw holes and lag bolt holes. This prevents the wood from splitting when boards are fastened together. As you can see in the photo, I have bound tape around my drill bit. This tape acts as a marker or gauge to prevent me from drilling the hole to deep or all the way through the board, hence, leaving a nice clean appearance when the job is complete.
Utilizing 2″ x 4” pressure treated lumber I begin to frame out the gate. Using the dimensions as described above, I lay-out all the pieces prior to screwing them together. I want my gate to be good and sturdy, so in addition to screwing the various pieces together, I have also elected to secure the corners with angle iron and lag bolts. I have spray painted my angle iron and lag bolts to match the gate hardware that I have selected, in this case Black. I have positioned the internal 2″ x 4″ pre-treated cross members to match up with the hardware that I will be installing.
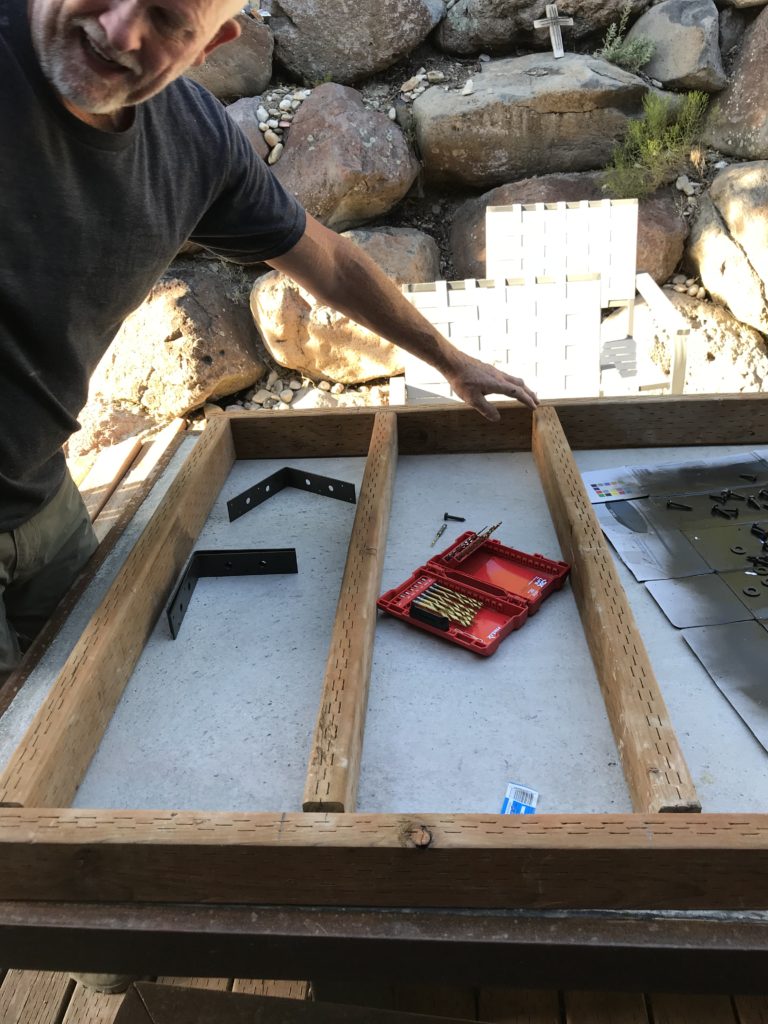
Making sure that everything is cut to length and will fit together properly prior to actually screwing and bolting the pieces together is always a good idea. Take your time, measure carefully, and as the saying goes “measure twice, cut once” We need out gate to be nice and square, it also needs to be very sturdy as it will need to stand up to years of abuse, slamming it shut and so forth!
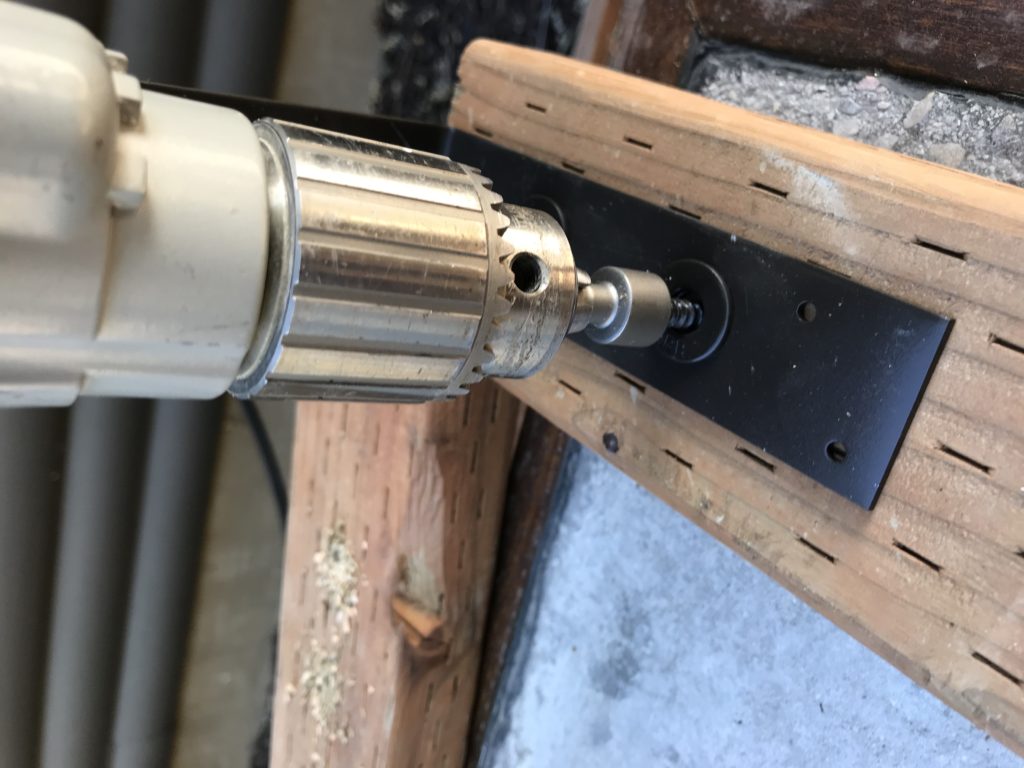
Measuring and pre-drilling for the lag bolt installation with the iron brackets. This adds considerable sturdiness to the gate, in addition, it makes it more aesthetically pleasing. Once this is complete I can assemble the remaining portions of the gate framing.
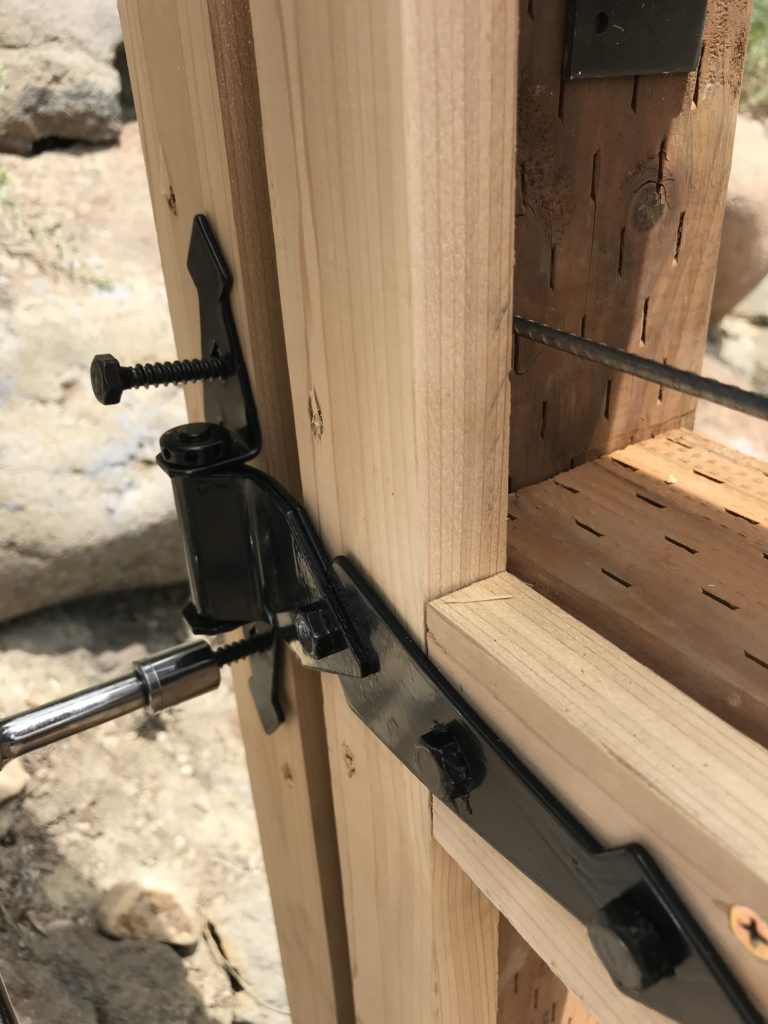
Assembling the framing of the gate using angle iron. Using a screw gun makes the job a whole lot easier!

While Ranger waits to play a game of football, I begin to install the cedar slats onto the gate. I have laid it out to match or align with the existing fence that we just constructed. Again, it is important to pre-drill the screw holes to prevent the wood from splitting. Once the cedar slats are screwed into place, I will measure, cut and install the wire messing to match the design of the fence. I will utilize 1″ u-shaped nail fasteners to secure the wiring to the wood framing, and as you can see, I then install the cedar around the perimeter, covering the edges of the wiring.
Fence Gate Installation
Using wood blocks to achieve the desired height (to match the existing fence), I measure and pre-drill the hole for the hinge and latch lag bolts. Once this is complete I secure the hinges and latch with 2 1/2″ black lag bolts as shown above. Choosing an appropriate height, I also pre-drill and install a gate handle.
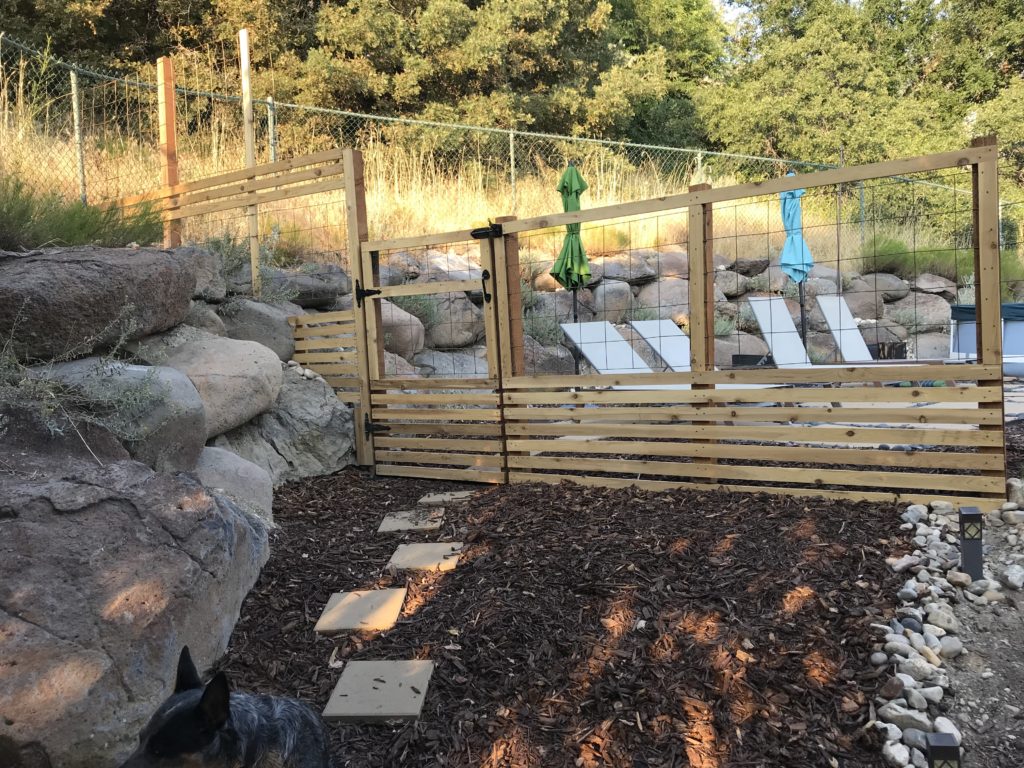
To finish the fence and surrounding area off, I have laid a thick covering of mess grass and weed preventing material covered in a heavy layer of brown bark. And as you can see, I have set in some paver steps leading up to the gate and pool area. This has left what was once hard, weed infested soil with a nice clean and finished look.
Summary
The finished product! It is good and sturdy and will undoubtedly withstand years of use. Over time, a year or two I think, the cedar will begin to turn gray in color taking on an even more rustic look. In my opinion, this will only add to the aesthetics of the fence. If however, it is your taste to keep the lighter, yellow nature of the fencing, then you might consider spaying the wood with a good quality exterior wood sealer. To preserve this look long term, it is likely that you will have to treat the fencing each and every year with wood sealer.
I hope you have found this tutorial helpful, it my goal to not only relay the basics of building things, but to also, hopefully, help to inspire you to be creative, to try new and interesting ideas and concepts…to be original and to build things to your own tastes. Your feedback and comments are always very much appreciated

Steve is a skilled craftsman & DIY expert – with years of general contracting and real estate development experience, Steve founded LetsFixItUp.com as an authoritative resource for home renovation, design and DIY projects.