
How to Install a Faucet
Installing a faucet is easy. There are so many differing styles to choose from, selecting the right faucet could prove to be the most difficult part of the task.
Whether a kitchen or bathroom faucet, the process for installation is for all practical purposes the same. There are just a couple of minor differences to consider that we will discuss as we proceed through the installation process.
Faucet installation tips
If you are replacing an existing faucet, make your work area free of obstructions and obstacles by removing all items from the cabinet in-which you will be working. Lay a towel or padding on the floor, extending into the cabinet to make things easier on your knees and back.
- Turn off both cold and hot water valves. The valves will be in the wall at the back of cabinet or coming up through the floor through the base of the cabinet. Turn knob valves counter clockwise.
- Utilizing a crescent wrench and/or a pair of channel lock pliers, carefully unscrew & remove the water supply lines from the valves.
- Inside the cabinet on the underneath side of the sink, unscrew the nut or screws holding the old faucet in place.
- On the upper side of the sink, when all water supply lines and screws or nuts removed, pull the old faucet upward to remove.
- Using a sharp putty knife or steel wool, remove all residue from sink where old faucet was sitting
- CRL can be very helpful as you clean up residue and stains from the sink surface prior to the new faucet installation.
Tools for new faucet install
Table could not be displayed.- Phillips Screw Driver
- Regular Screw Driver
- Crescent Wrench (2)
- Channel Lock Pliers
- Pliers
Our recommended faucets
Table could not be displayed.We recommend any of these well-rated and popular kitchen and bathroom faucets available on Amazon (with quick Prime shipping!)
Steps to install your new faucet
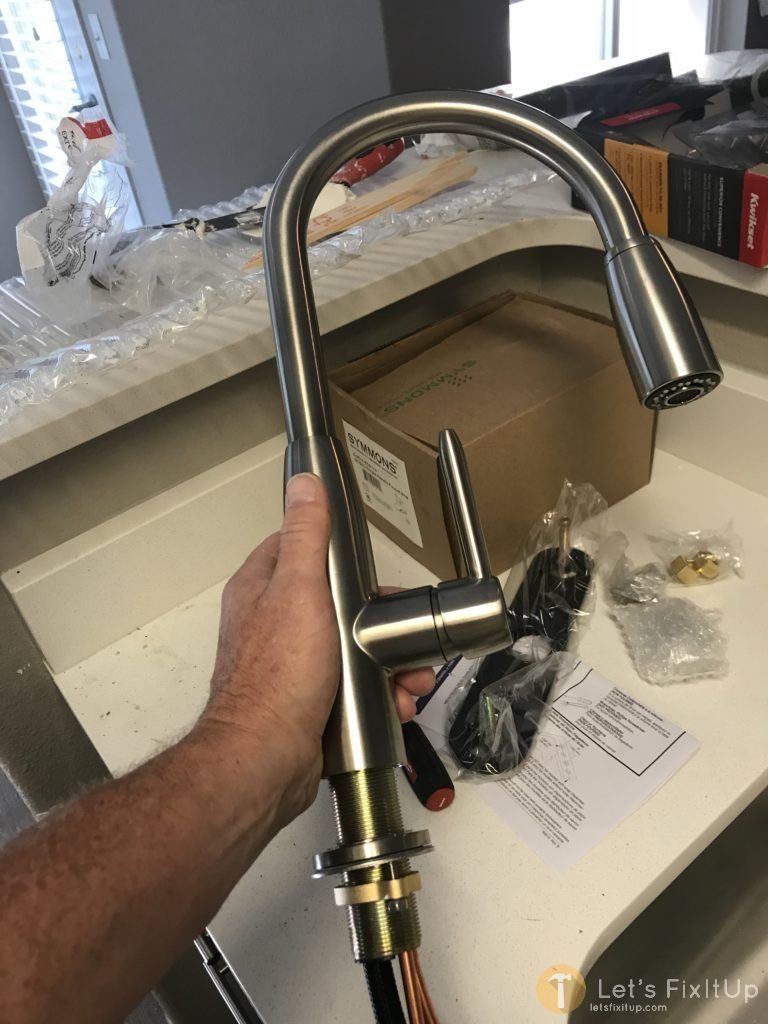
Remove the faucet from the packaging. Make sure that you thoroughly look through the box so you do not miss any of the parts. Lay all the parts out on the counter so you have all components identified and ready to install. Utilize the parts list that can be found in the faucets instruction booklet.
Disassemble the parts that may be temporarily placed on the faucet, as a means for ease of identification. Lay the parts out on the counter, pay attention to the order in which you disassembled the faucet, as this is the order (in reverse) that you will install the parts during faucet installation.
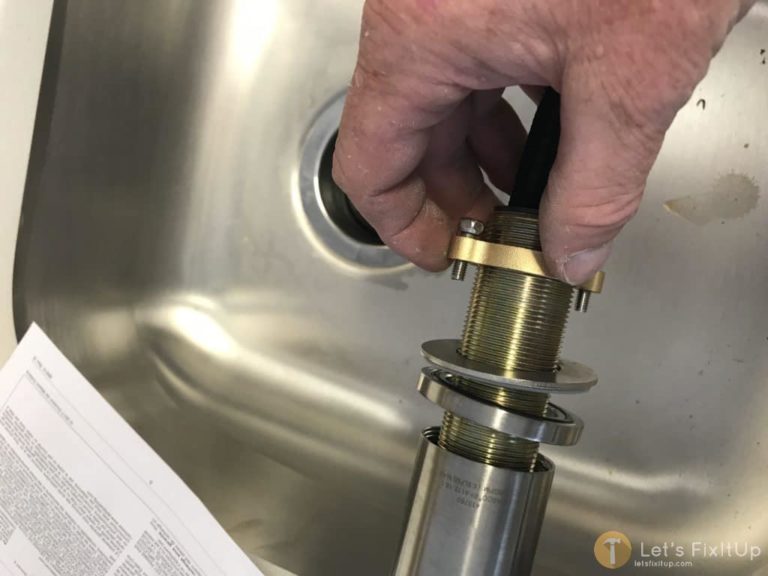
Insert the water line hosing and the removable faucet head hose through the hole on the upper side of the sink. On the underside of the sink (within the cabinet) guide the nut around the water supply hoses and the removable faucet head hose. Twist the nut onto the threads of the faucet that have inserted through the sink faucet hole. Leave it just finger tight so adjustments to align the faucet can be completed.
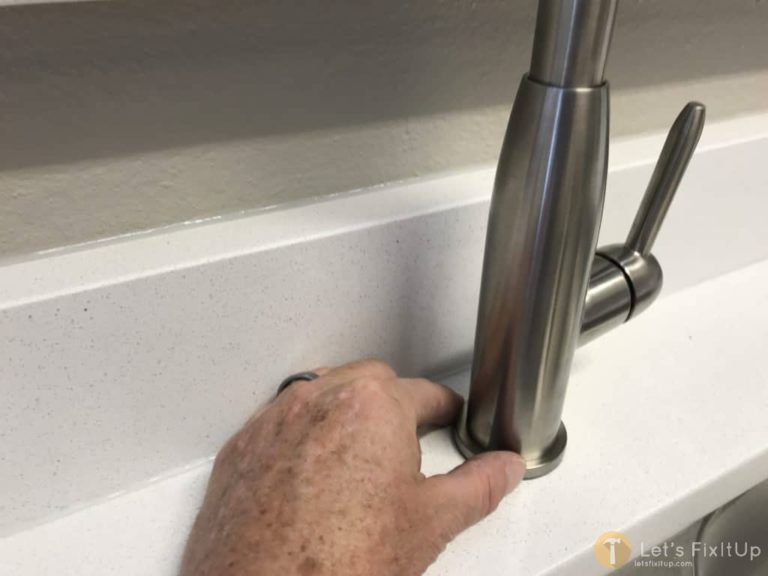
Prior to completely tightening the nut under the sink, position the faucet on the sink top so it is aligned in the correct manner.
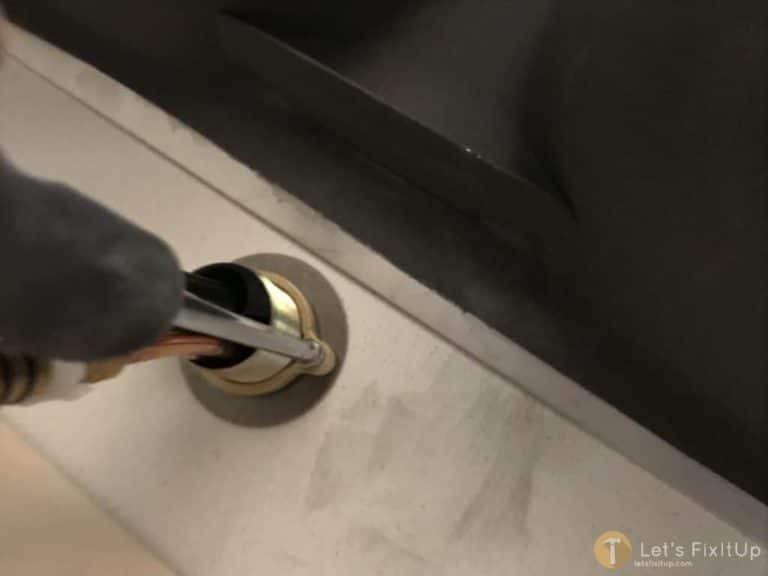
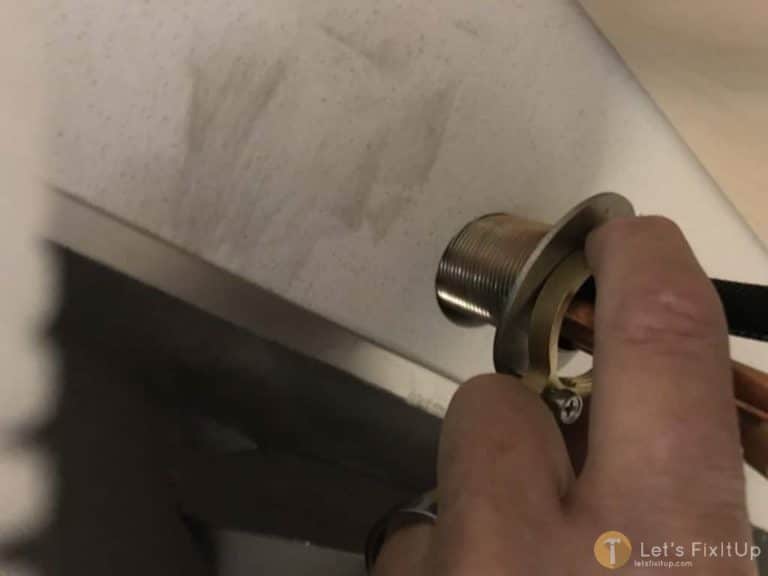
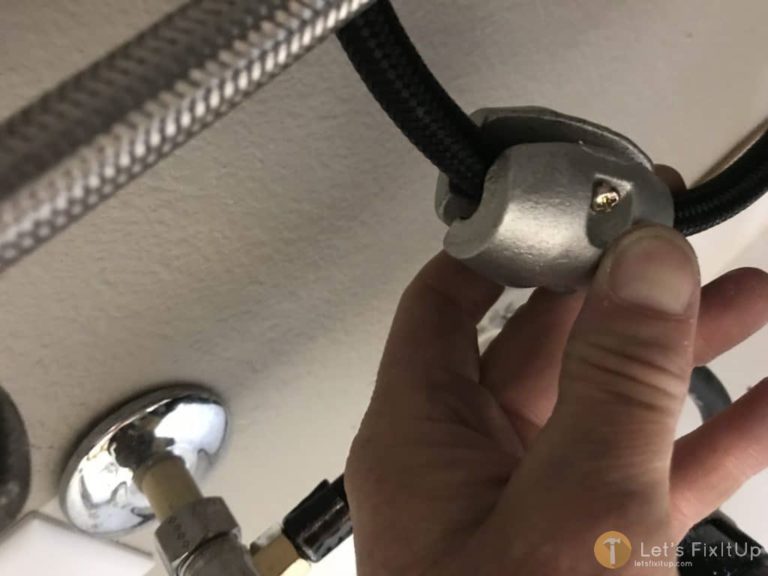
With this particular faucet, just hand tighten the nut onto the faucet threads, finish tightening by turn the two screws that are contained on the nut counter clockwise until the faucet is securely fastened to the sink.
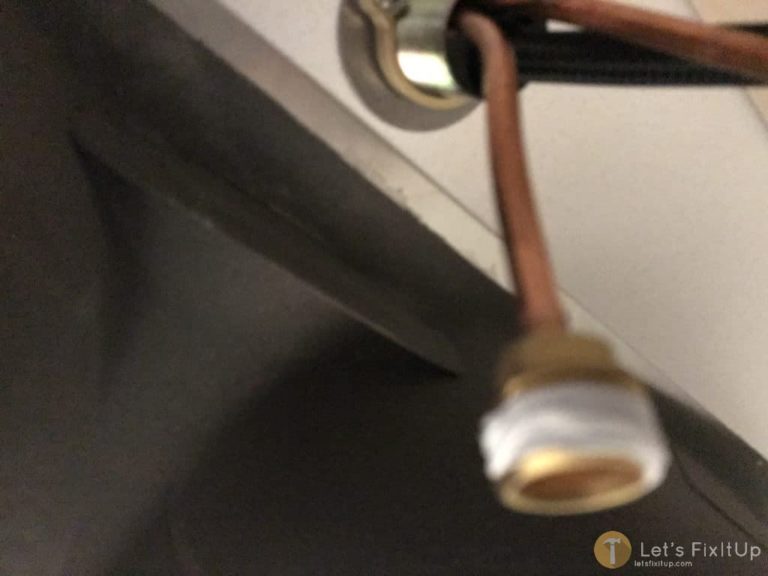
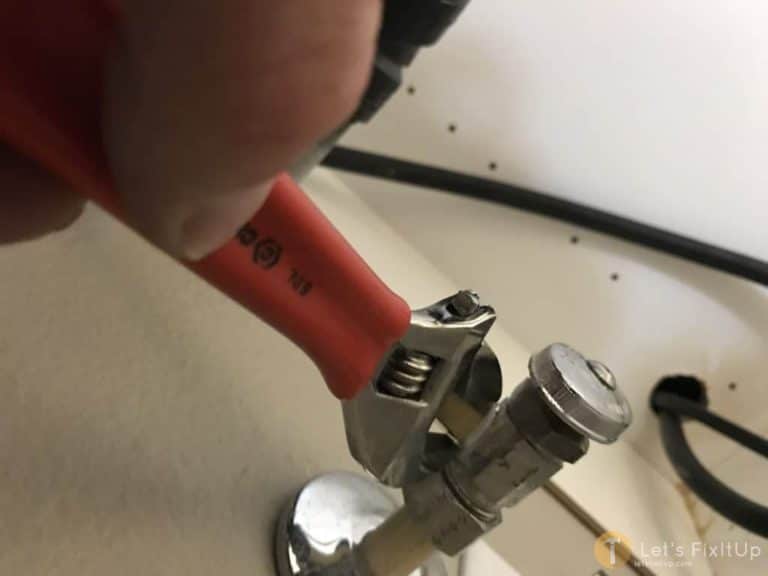
Using plumbers tape, wrap the threads on all water line connections.
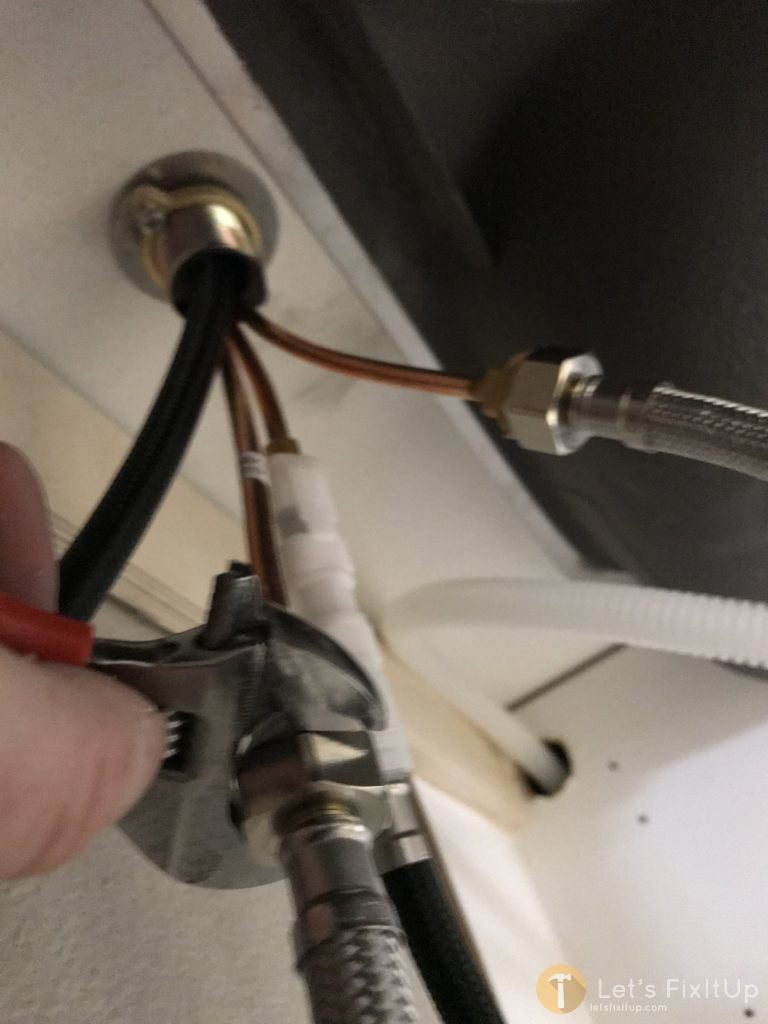
Once the threads are wrapped with plumbers tape, connect the flexible water hose to the copper line coming from the faucet, connect both the water lines using the appropriate length of flexible hose that will easily reach from the faucet (copper line) to the water shut off valve coming from the wall at the back of cabinet.
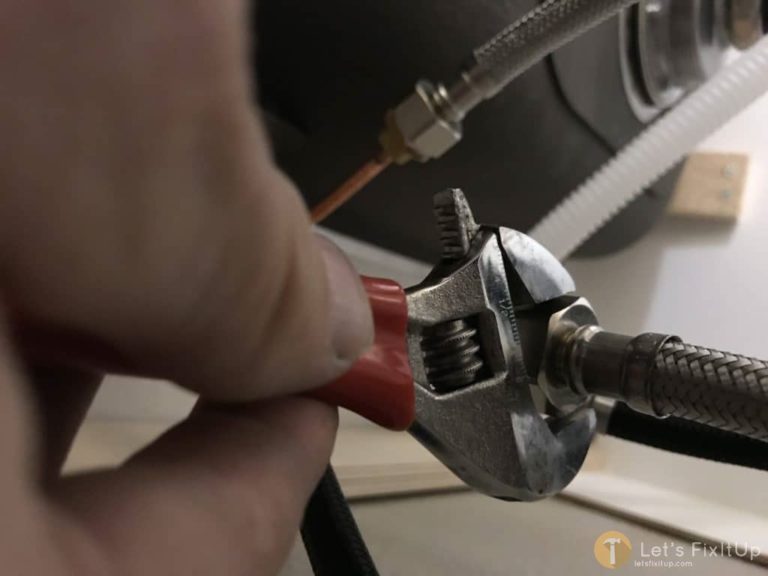
Using 2 crescent wrenches and/or channel lock pliers, tighten the water connection fittings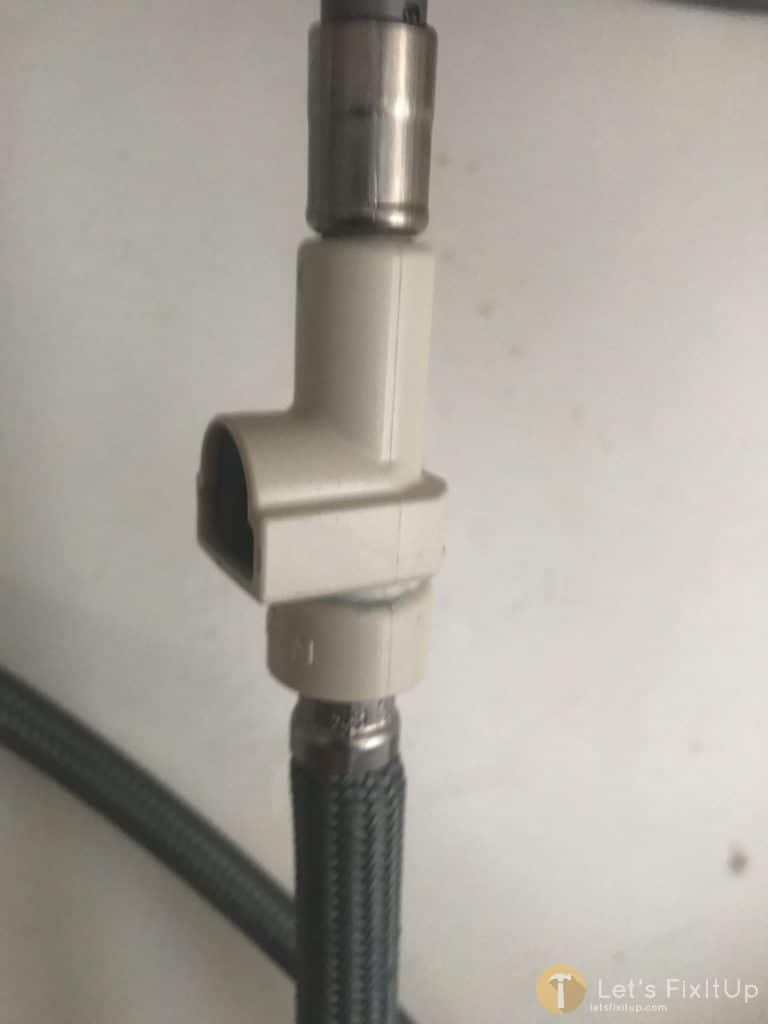
Snap together the two white connection end for the removable spray-head water hose. Make sure that each side it lined up properly with the corresponding connection configuration on the other connection piece.
Install the steel weight onto the water-line that goes to the removal spray head. Within the cabinet, install the weight approximately on the half way point, or at the bottom of the loop. This will insure that the faucet nozzle will retract when the head is let go. Adjust the placement of the weight as necessary.
Finally, connect the water line to the water turn on valve. Make sure that you wrap the threads with plumbers tape, then connect cold to cold and hot to hot, otherwise your cold water will be on the left faucet handle and you hot will be on the right handle, just opposite of what you will want.
Let’s Fix It Up sincerely hope that you found this simple tutorial helpful.
No products found.
MORE: How to install a garbage disposal demonstrates how to hook up the drain system for sinks.

Steve is a skilled craftsman & DIY expert – with years of general contracting and real estate development experience, Steve founded LetsFixItUp.com as an authoritative resource for home renovation, design and DIY projects.
Thank you for this!!! I just bought a new faucet with this same type of nut
(three lobes, and screws going up into the faucet–mine is a Kraus), and couldn’t find a sink wrench that would work with it. I didn’t realize that you just have to hand-tighten the nut, and it’s actually the *screws* that do the real work of holding it tight. The instruction manual didn’t make that entirely clear. Now I’m actually looking forward to the installation~