How to Install a Dog Door Updated for Fall 2020
Cat & Dog Door Installation Means Convenience
Isn’t it amazing just how much we love our pets? More specifically, our dogs and cats. Very much like other members of our family, we want to provide for our pets a level of convenience and comfort. With the installation of a pet door, we provide that convenience not only for our pets, but for ourselves as well.
As with my dog Ranger, he would go to the back door and bark until someone would let him out. Now don’t get me wrong, that’s a great thing when he has to go potty, but all to often, he just wants to go outside to have a look around check for strangers or to just do a-walk-about. There have been plenty of times that I found myself getting irritated and/or frustrated with the amount of times that I had to stop what I was doing to let him out, and then of course, another interruption when he wants back in again.
With the installation of a Pet Door this has virtually stopped, because now, Ranger can come and go as he pleases without the necessity of interrupting other members of the family.
Selecting the Best Dog Door Location
Selecting the correct Dog Door location is critical to its success, both from a functionality perspective and an aesthetics perspective. Many pet owners choose to install the pet door in their back or side door, or perhaps in the wall directly adjacent to the door. You will need to select what works best for you and your pet, taking into consideration several factors that may include;
- Accessibility for your pet (inside and out)
- Is the area outside the Pet Door fenced?
- Safety- Is the placement of the Pet Door safe for small children etc.?
- Aesthetics- Does the pet door look good at the selected location or does it detract and look out of place?
- Functionality- Does the Dog/Cat door work well in the selected location.
- Cleanliness- Are there mechanisms in place to help reduce the amount of dirt, mud and various debris your pet may track in?
- Interference- With a wall mount Pet Door (which this tutorial demonstrates), make sure that you are clear of any wiring, water piping, venting etc.
For Rangers’ DIY dog door installation, I chose a wall mount unit that will be installed under a window in the laundry room. I like the fact that he can come in on the tile flooring, that I can contain him in the laundry room if necessary, that his food and water are located here, that it is not in the main living area and is out of site.
Tools Needed For Pet Door Installation
- Tape Measure
- Level (optional)
- Circular Saw
- Reciprocating Saw (Sawzall)
- Sledge Hammer, Hammer (depending on wall type)
- Screw Gun
- Caulk Gun
- Paint Brush
Sizing Up Our Dog Door
Make sure you purchase a Pet Door that fits your Dog or Cat, you don’t want it to big or to small (Take some measurements of your pet if you need to). Once we have purchased the appropriately sized door and determined its location in the home. let’s begin by measuring the precise size of the door.

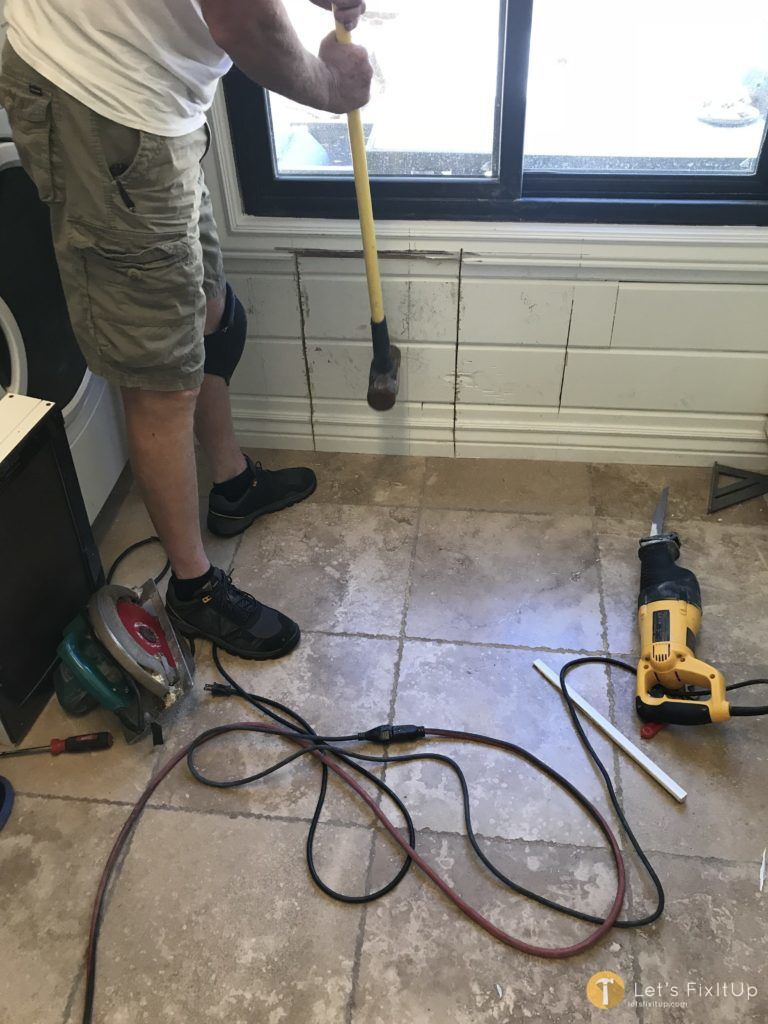
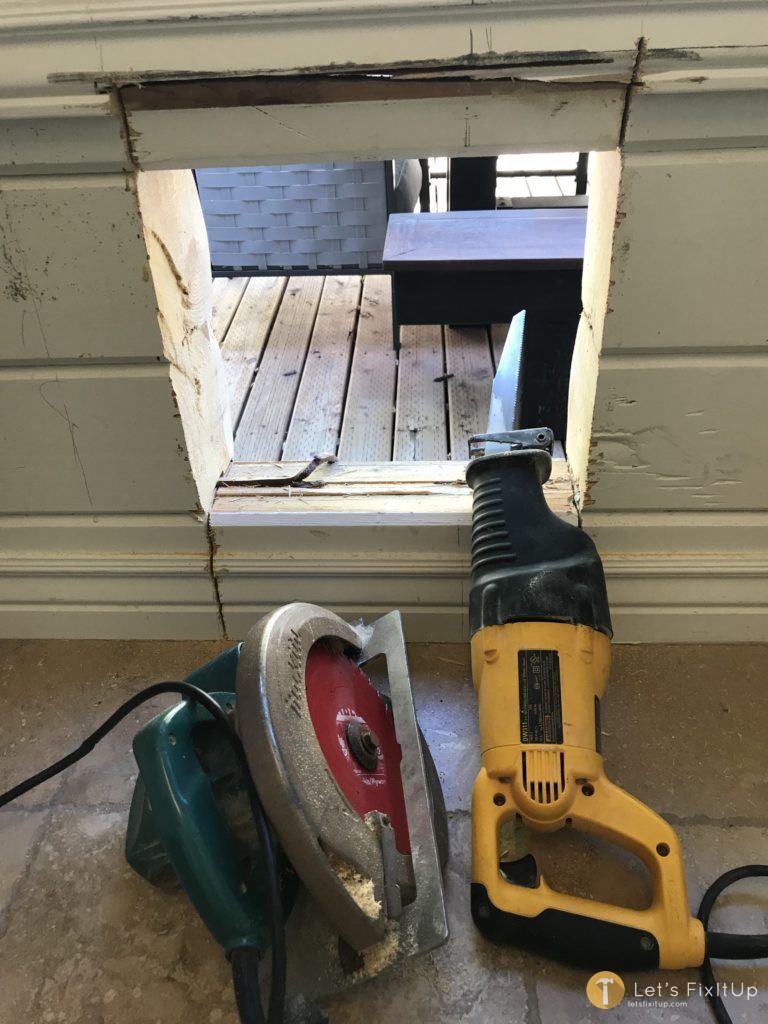
Once we have determined the dimensions of the Pet Door we can now lay it out on the wall in preparation for cutting. I prefer to use a level when marking my cuts to help insure that the door will be square and even when cut, and eventually installed.

Have you ever heard of the saying “measure twice, cut once”? it is always a good idea to double check your measurements! Ensuring that I know where the cut is going to come out on the exterior, I adjust my circular saw to its maximum depth and cut the main body of the hole. I finish up the cut using the reciprocal saw, this way I do not over cut the actual opening that I desire. I am then able to knock out the cut portion of the wall with a little persuasion.
I am now ready to insert the Pet Door into the opening. Having measured & cut the opening correctly, the Pet Door slips in nicely with a good snug fit. Not knowing the exact thickness of my walls when purchasing the Dog door, I elected to buy the adjustable, telescopic door, this worked out very nicely as I was able to adjust it it the exact thickness of my walls.
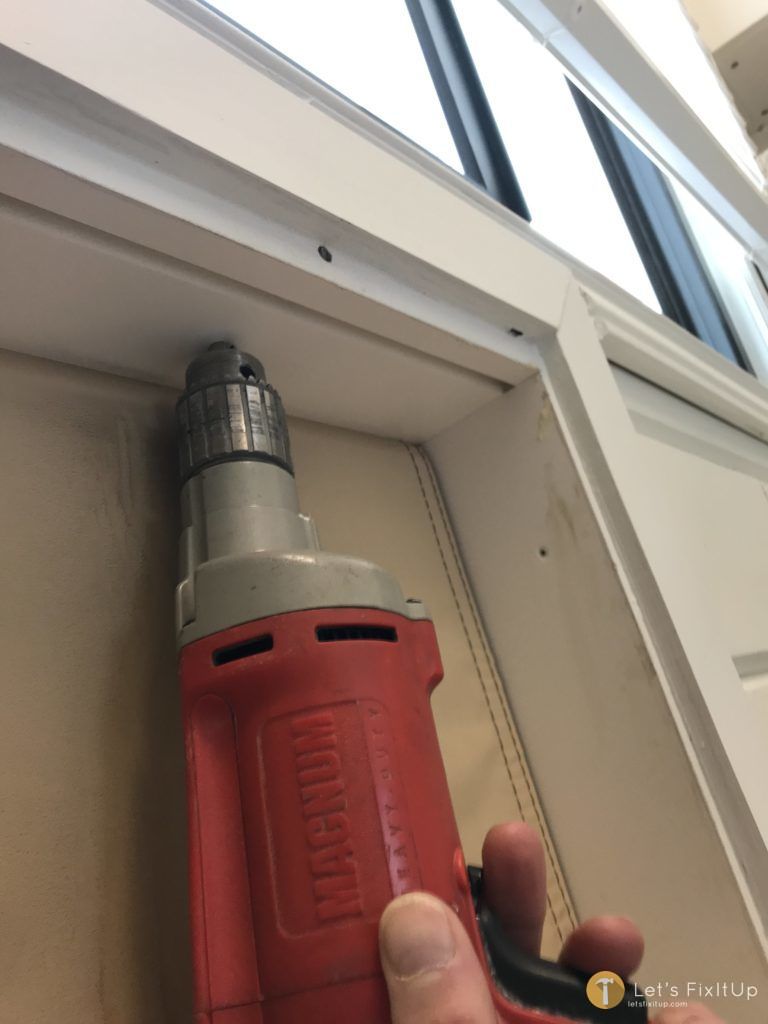
Making sure that the Doggy Door is positioned evenly on all sides, I secure the door with my screw gun, Utilizing 2-2 1/2 ” screws on each side, guaranteeing a lasting placement.
Trimming Out Our Doggy Door
Now that our Pet Door is in place, I install 3″ x 1/2″ pine, cut at 45 degree angles to trim out our dog door. Then to complete the Pet Door project it is important to do the following:
- Sand all the rough wood using 100-120 grit sandpaper to ensure your pet is protected from slivers.
- Caulk all gaps and cracks between pieces of wood trim and where the Dog Door meets the wall.
- Counter sink all screws. Fill and sand the holes.
- Prime paint all bare wood surfaces (inside and out) of your pet door.
- Paint two coats of finish paint to your desired color specifications.
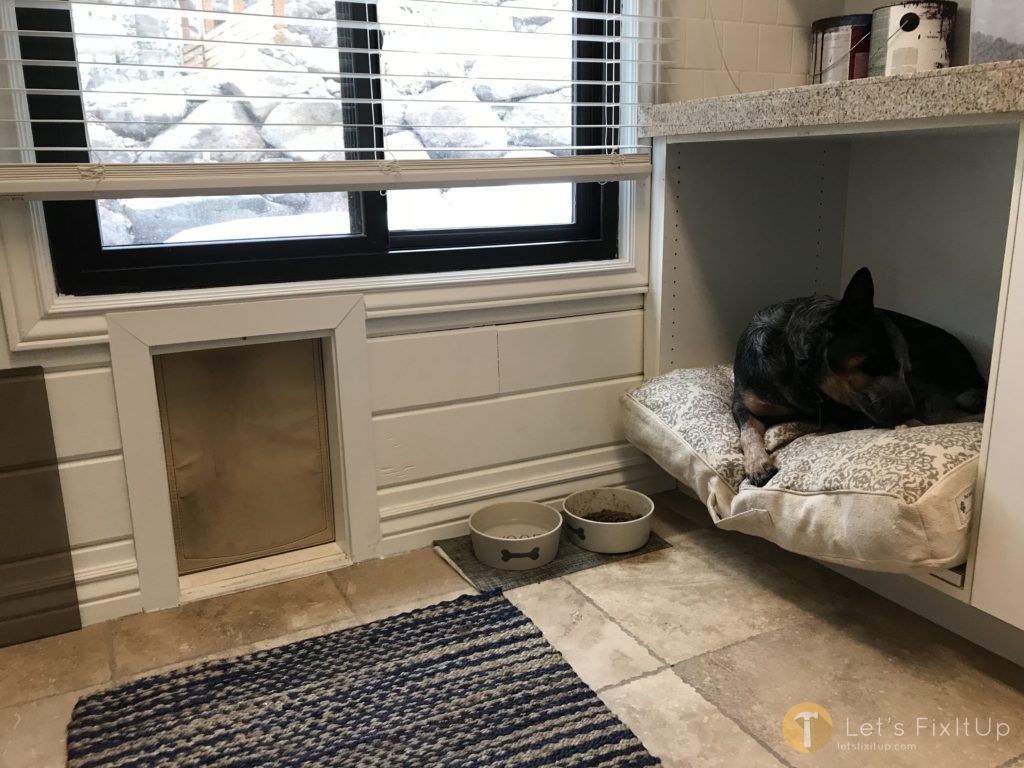
With all the measurements taken, all the holes cut and finishing touches applied, Ranger can now rest, knowing that if he needs to go potty he does not have to rely on anyone to let him out. After about 1 minute of training Ranger quickly learned how to use his new Doggy Door. With the heavy material, surrounding strips of metal, the Pet Door easily and securely magnetically seals and reseals after each use. As you can see in the above picture on the left, the shaded plastic window easily fits into the slots on the interior frame of the Pet Door providing for additional safety and weather protection when the dog door is not in use.
Exterior Finishing Touches of the Dog Door
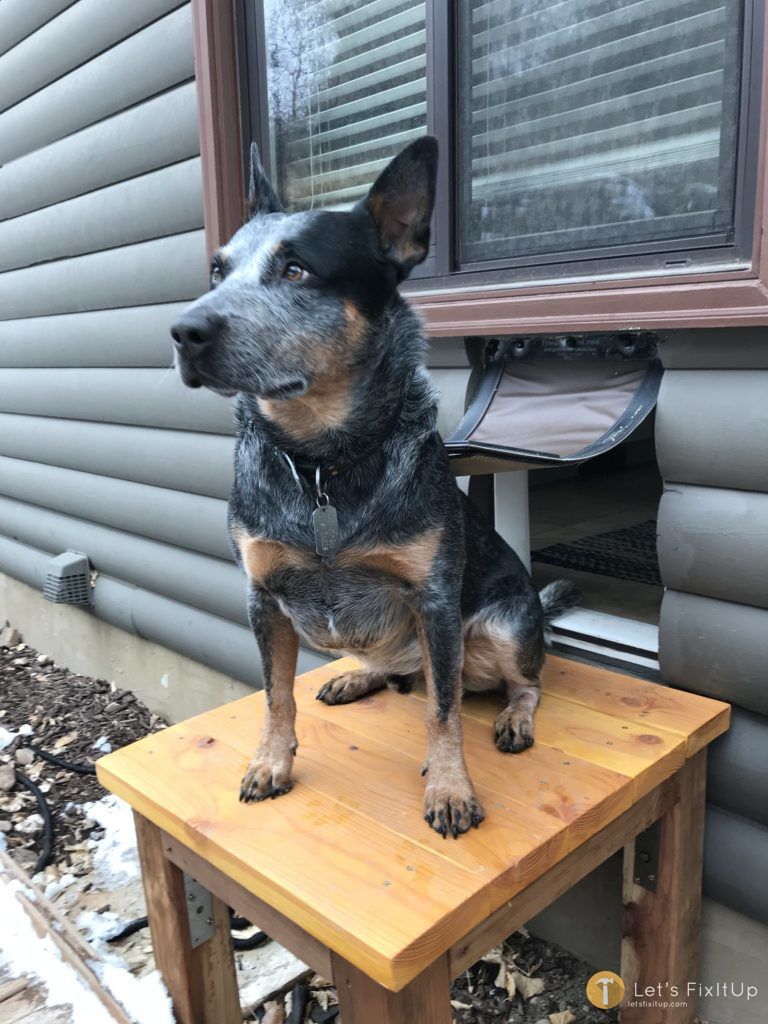
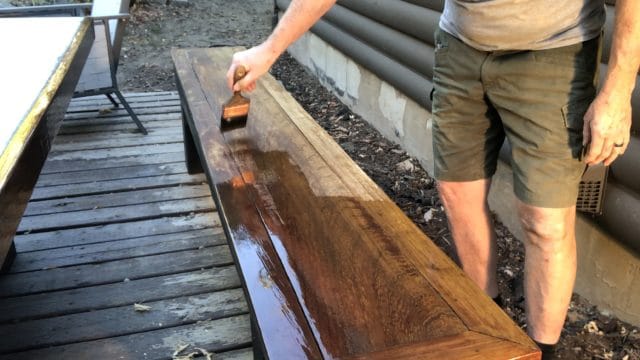
The exterior worked out so that it was just about 2′ off the ground up to the Pet Door. That’s a tough entrance even for the most talented of dogs, not to mention a brutal fall on the way out. So, to fix this little problem, I built a small table/landing ramp for the doggy door to bring it to height with the opening. Simply constructed out of 4″x 4″ posts, topped with 2″ x 2″ pine and a couple of coats of clear sealer I was able to provide Ranger with an entrance and exit that he could easily manage and feel comfortable using.
Amazon has a wide selection of awesome Pet Doors, one of which should work perfectly for you. Check the Selection and Pricing here

Steve is a skilled craftsman & DIY expert – with years of general contracting and real estate development experience, Steve founded LetsFixItUp.com as an authoritative resource for home renovation, design and DIY projects.